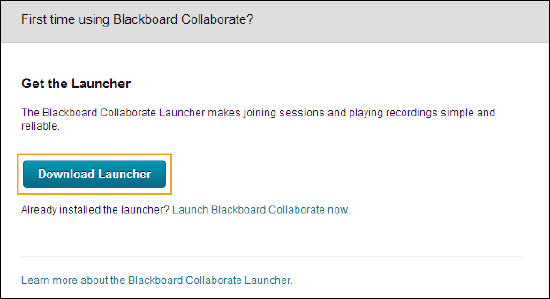
Open Media Wifi Bridge Software For Mac
Networking devices are often (more often than any other computer-related product) made for Windows PCs and boxed with Windows installation software that doesn’t even acknowledge the Mac’s existence. But many companies’ growing tendency to design networking products that use standard Web interfaces, instead of special software, is good news for Mac users. After all, we can use Web interfaces, too. Take $129 WET11 Wireless Ethernet Bridge. With it, you can attach any Ethernet-capable device to your AirPort network.
The WET11’s documentation doesn’t mention the Mac, but with a little networking savvy, you can make good use of the device. Here’s a guide to configuring this wireless bridge—and keep in mind that since these steps are generally about configuring your Mac’s networking preferences, they’re largely applicable to other Web-enabled devices, particularly wireless networking products such as bridges and routers. Before You Start The first step in connecting to the WET11 or any other wireless networking device doesn’t involve the device at all. Instead, it involves your wireless base station—whether it’s an AirPort Base Station or some other wireless router. For the WET11 to work, it has to connect to your base station.
That means it needs to know your base station’s name and, more important, password (if your router is password protected). If you’re using a non-Apple router, you’ve probably got a password that looks something like 2156g6886d —a bunch of gobbledygook in hexadecimal format. If you’ve got an AirPort Base Station, you have a normal password, but it’s compatible only with other Apple devices.
For the WET11 to work, you need to get what’s called an equivalent network password—one that also looks like a bunch of gobbledygook. To find that password, open the AirPort Admin Utility application, located in the Applications: Utilities folder. Connect to your Base Station and choose Base Station: Equivalent Network Password (see first screenshot). Write down the resulting WEP key information, and save it for later.

Make the Connection The problem with connecting to many Web-enabled devices is that their out-of-the-box network configurations won’t mesh with yours. Even if you plug the device into your network, you can’t access it because it thinks it’s on an entirely different network. You’ve got to modify your network settings to match the ones built into the device. Connect your Mac directly to the WET11 via its included Ethernet cable, and then open System Preferences and click on the Network pane. So as not to mess up your existing network settings, click on the pop-up list next to Location, choose New Location, and name it wet11. Then make sure that the Show menu is set to Ethernet Port and that the TCP/IP tab is showing.
The WET11 is set up with a default IP address of 192.168.1.225. To connect to it, you need to set your Mac to be on the same subnet as that device. You do this by temporarily setting your Mac’s IP address to one that starts with 192.168.1, the same first three numbers as the device’s IP address. Set the Configure pop-up menu to Manually, and then enter a new IP Address—for example, 192.168.1.1. Set the Subnet Mask to 255.255.255.0. Click on Apply Now, and close System Preferences (see second screenshot). (Each device is different—if you’re not configuring a WET11, check the documentation to see what default IP address your device has.
For example, Linksys’s $179 WET54G—an AirPort Extreme-compatible equivalent of the WET11—has a default address of 192.168.1.226.) Now open your favorite Web browser and connect to You should be prompted for a user name and password—for the WET11, the user name is blank and the password is admin by default. Once you enter this information, you should see the Setup Web page for the WET11 in your browser. At this point, if you’re familiar with setting up the TCP/IP configuration of other devices on your network, you should be able to figure out how to configure the WET11. But if subnet masks and SSIDs leave you baffled, read on. Configure This The WET11’s Setup page is very similar to the Network pane in System Preferences.
Just like your Mac, the WET11 has to have proper TCP/IP settings in order to function on your network (see third screenshot). The settings you need to enter into the Setup page will vary depending on how your network is configured. If all your Macs get their IP addresses from a DHCP server, you should be able to select the Obtain An IP Address Automatically (DHCP) option and be done with the process. A likelier scenario, though, is that your Internet provider has assigned a limited number of IP addresses to you. If you’re running an AirPort Base Station, the best option is to select the Distribute IP Addresses option, located in the Network tab of the AirPort Admin Utility application. When you do this, your Base Station will assign temporary addresses to any device that connects to it, including the WET11. Most other wireless routers offer similar functionality, although the option may be called DHCP And NAT.
If you’re using a Mac with an AirPort card installed, you’ll need to visit the Internet tab within the Sharing pane of System Preferences. Select the Share Your Internet Connection option, and click on Start—your Mac will perform the same routing functions that a Base Station would. Likewise, with this approach you can set the WET11 to obtain an IP address— 10.0.1.10, for example—automatically.
But the drawback is that you have to configure the WET11 via a Web interface, and devices that use DHCP can have different IP addresses at different times. This can make finding devices on a network difficult, since you’ll have to guess what their IP addresses are.
Also, if you’re using a Base Station’s Distribute IP Addresses feature, the WET11 will be part of a private, internal network that you can’t access from the outside world. If you want to connect to your WET11 reliably, you’ll need to configure it manually.
Enable the Setup page’s Use The Following IP Settings option, and then assign your WET11 a static IP address that is within the range of the internal network and is a number so large that your Base Station will probably never have to count that high. I gave my WET11 the IP Address 10.0.1.220 —any number higher than 200 in the fourth position will probably suffice; Ithen set Subnet Mask to 255.255.255.0 and Gateway to 10.0.1.1.
That way, when I’m attached to my AirPort network, I’ll be able to bookmark in my browser and know that it’s the WET11’s configuration page. Before you save your WET11’s network settings, you need to fill out a few more fields on the Setup page.
In the SSID field, enter the name of your Base Station—for example, Burger Island. In most cases you’ll want to keep Infrastructure, the default setting, selected in the Network Type field. If your Base Station has a password, you’ll need to select the Enable option next to WEP and click on WEP Settings, which will open a new browser window.
In this window, you’ll type the network equivalent password or WEP key you wrote down earlier. Enter it in the Key 1 field, and set 1 to be the Default Key.
Then click on Apply at the bottom of the page to save your settings. Once that’s done, you’ll return to the Setup page. Click on Apply, and your WET11 will update its network settings. Then be sure to click on the Password tab at the top of the page and give your WET11 a new password so no one else can modify the device’s settings. Disconnect your Mac from the WET11. Then unplug the device, wait a moment, and plug it back in.
The device’s WLAN light should turn on, indicating that it’s connected to your network. At that point, you can attach any device you want to the WET11’s Ethernet port—including hubs, printers, AirPort-incapable Macs, and more—and they’ll be on your network, connecting back to your Base Station without wires.
DD-WRT Routers. Creates a powerful, business-class router!. Give your wireless signal the boost it needs!. Monitor and control the allocation of your own bandwidth! Plain and simple: your average router's stock firmware just won't cut it.
Open Media Wifi Bridge Software For Mac Download

If you want a router without gaping vulnerabilities and flaws, a router that is versatile, powerful, and controllable, you want a router with DD-WRT firmware. This open source project has been wowing users since its inception, and it's the backbone of what we do here at FlashRouters: we pick an already strong device, flash it with DD-WRT, and watch it bloom.
Open Media Wifi Bridge Software For Mac Free
If you want a stronger wireless signal, bandwidth that you can control, and access to advanced security options, you want a DD-WRT router.